A Digital Marketer’s Guide to Button Tracking Using Google Tag Manager and Google Analytics
Editor’s Note: Looking for information on how to set up button tracking Google Analytics through Google Tag Manager? We get it. It’s also likely that you are still using the traditional version of the platform – Universal Analytics. In case you didn’t know, you are at risk of losing any of your historical performance data in 2023 if you don’t set up and properly configure Google Analytics 4. Learn how the two platforms compare to each other in this blog post – Google Analytics 4 vs Universal Analytics.
You’ve got your website up and going strong, using some best SEO practices or maybe driving traffic from an ad or two, and you have buttons that you want your readers to click. Buttons are useful for prompting your readers to take an action — clicking a button signals intent, and a customer indicating intent is a customer getting closer to converting.
What good is a button if you’re not keeping track of who’s clicking it? This is just scratching the surface of what Google Analytics can do for your button tracking needs, but it’s the perfect place to start.
Before You Begin:
- Make sure you have Google Analytics installed on your site.
- Make sure click variables are enabled/checked and published in GTM.
- Variables > Configure > Clicks
Step 1: Understanding How to Locate Your Available Button Selectors
- In GTM, go to preview mode by clicking on “Preview.”
- Open the webpage where your button is located.
- You should see the GTM preview pane show up on the bottom of the screen showing a summary on the left and all your tags fired and tags not fired.
- Click on the button you’re looking to track. This will create a new step in the summary section.
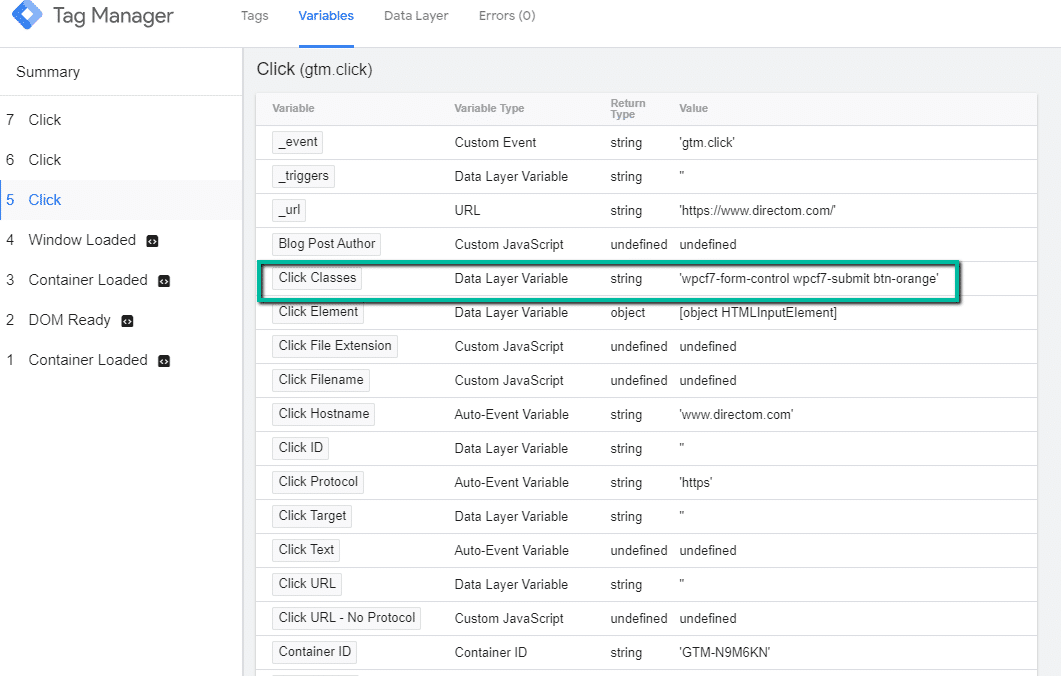
- Locate the click you just generated by clicking on the button and click on it. From there, select the “Variables” option on the header of the GTM preview pane.
- The preview pane will populate with the following information:
- Variable
- Variable Type
- Return Type
- Value
For this exercise, we’ll be focusing on the Variable and the corresponding Variable Value to set-up tracking for the button.
Step 2: Understanding & Choosing the Selectors Available to You
As mentioned above, the Variable and Variable Value will be used to track your button clicks. Some items to consider when choosing your selector:
- You’ll want to make sure the variable and value you choose is unique and is not somewhere else on your site.
- If the variable and value are not unique, you may have to use a combination of selector methods to track one particular button.
- If the variable value is blank or contains “, you cannot use that variable and variable value to track the button.
- Well, you could. But we’re not going into that level of development and detail in this post.
- Choose your variable and variable value. In this case, I’m going to use the “Click Classes” variable and the corresponding variable value of ‘callout-wrapper.’
- Make note of the variable and variable value, we will be using this information in Step 3.
Step 3: Setting Up in Google Tag Manager – Trigger:
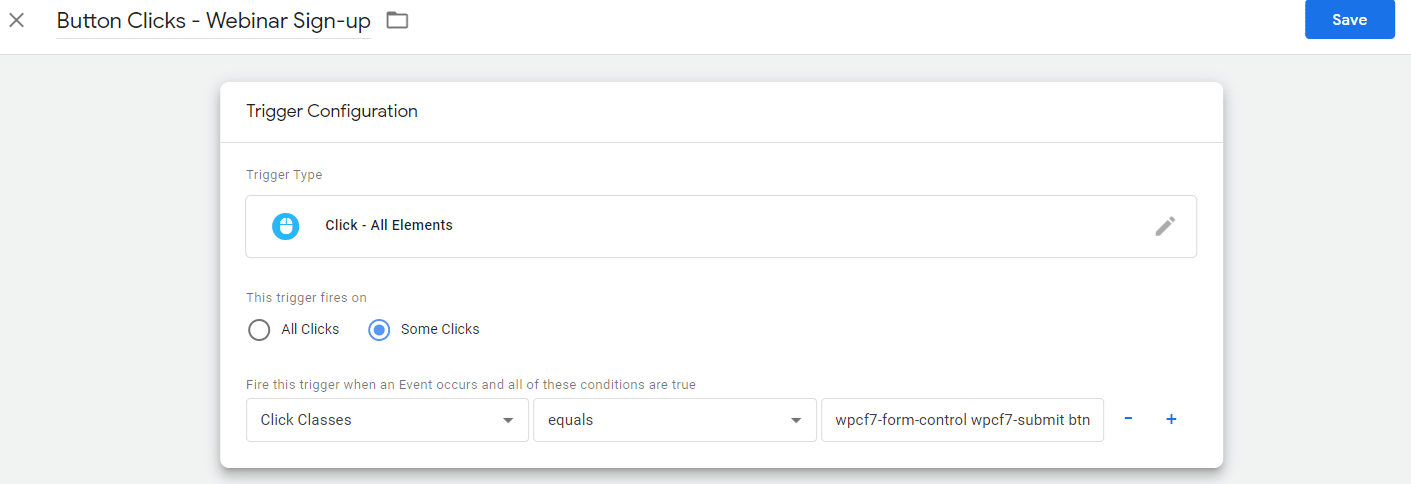
- In Google Tag Manager, navigate to the Triggers section. Click “New” to create a new trigger.
- Pick a name for your trigger. Make sure this name is somewhat descriptive and easy to identify what it’s referring to.
- Configure your trigger.
- Choose your trigger type by selecting “Click – All Elements.”
- Choose when your trigger fires by selecting “some clicks.”
- Refer to the variable and variable value selected to fill out the conditions for when the trigger fires. For this trigger we will make the following selections:
- Click Classes
- Equals
- callout-wrapper
-
-
- Save your trigger
-
Step 4: Setting Up in Google Tag Manager – Tag:
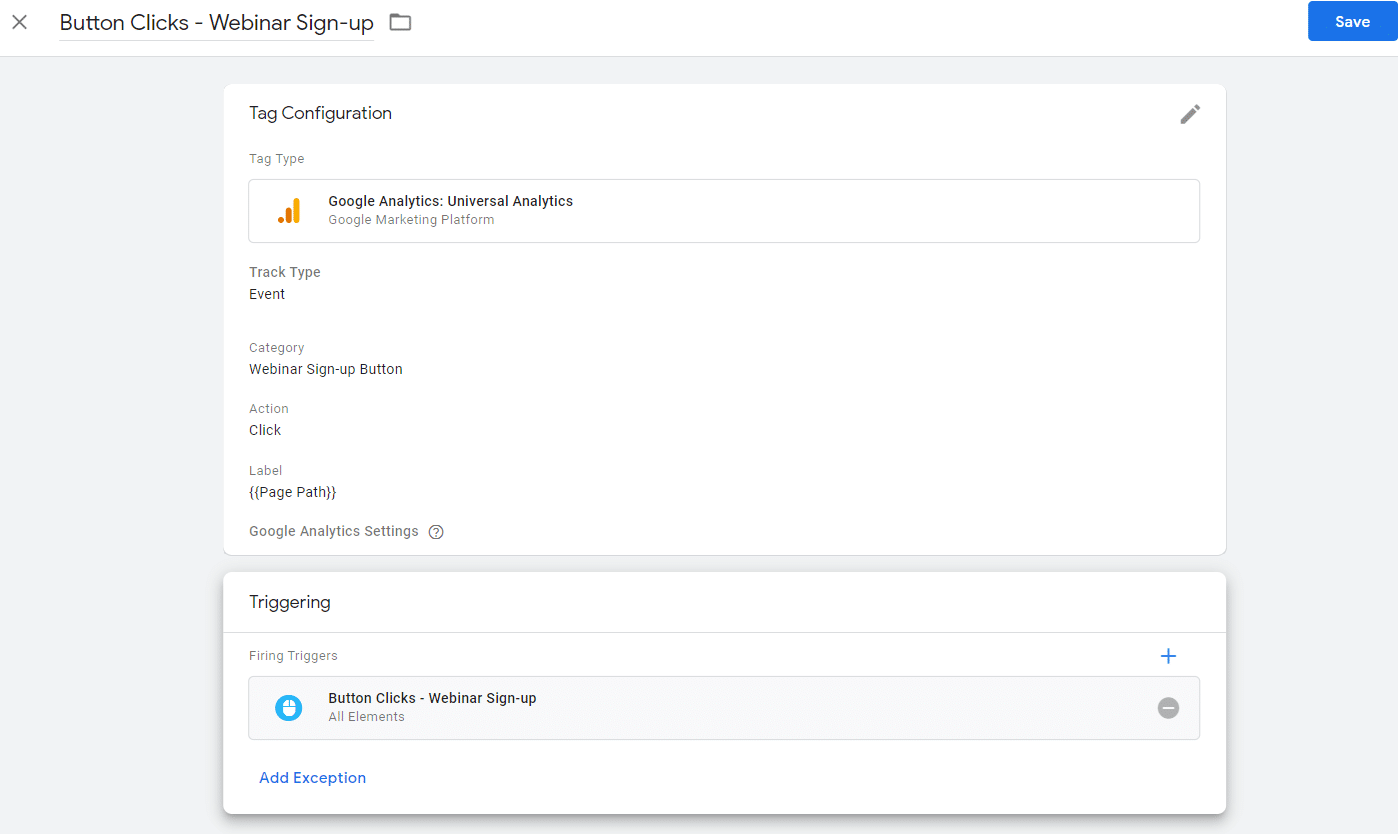
- In Google Tag Manager, navigate to the Tags section. Click “New” to create a new tag.
- Pick a name for your Tag. Make sure this name is something somewhat descriptive and easy to identify what it’s referring to. I recommend naming it something similar to your trigger.
- Configure your tag.
- Choose your tag type. In this case, “Google Analytics: Universal Analytics.”
- Choose your track type. In this case, “event.”
- Set up the naming and configuration for your Google Analytics event:
- Category
- Action
- Label
- Value (this field is not necessary and is only used in some cases)
- Choose your correct Google Analytics Setting variable.
- Set up the naming and configuration for your Google Analytics event:
- Choose the correct trigger for your tag. In this case, it will be the trigger we created in Step 3.
- Save your tag.
Step 5: Test Out Your Set-up:
- Open up your corresponding Google Analytics profile and navigate to Realtime – Events reporting. Keep that tab open.
- Once you’ve set up and saved your trigger and tag, click on “Preview” in Google Tag Manager. Keep tag manager open.
- In another tab, load the page that contains the button that we just set-up tracking for.
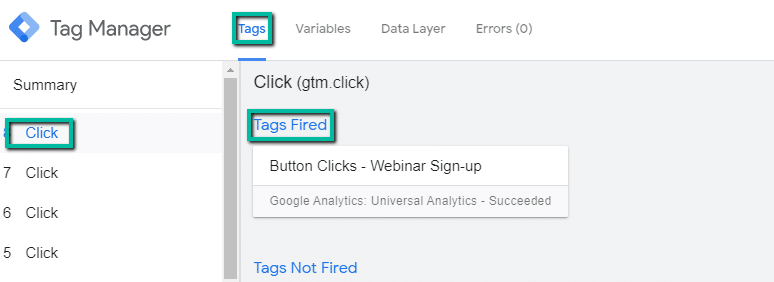
- You should notice that the tag we just created should be in the Google Tag Manager preview pane under “tags not fired.”
- Click on the button you just set-up tracking for.
- You should notice that the tag we just created should move to the “tags fired” area of the preview pane.
- Once you’ve confirmed the tag is working in Google Tag Manager, check your Realtime > Events reporting in Google Analytics.
- You should see the event populating in Google Analytics.
You did it! Now enjoy the fruits of your labor. You earned it.
If you’d like to do more with tracking or Google Analytics, don’t miss these articles:
- How to Track Users Across Subdomains (Without Going Insane)
- 7 Easy Steps To Set Up Cross Domain Tracking With Google Tag Manager
- How to Track Blog Posts by Author in Google Analytics
- Track Data Studio Report Engagement with Google Analytics
To get more information on this topic, contact us today for a free consultation or learn more about our status as a Google Premier Partner before you reach out.


